12 Best Clear iPhone Cases
12 Best Clear iPhone Cases
So you’ve got an iPad and a shiny new Apple Pencil, and you’re ready to start creating. That’s awesome! Getting them to talk to each other is surprisingly simple, but the steps change depending on which Pencil you have.
Don’t worry — it’s way easier than it looks. We’ll figure out which model you’re holding and get your Apple Pencil iPad connection sorted out in just a minute.
Before we start pairing, let’s quickly identify your Pencil. It’s easy to tell them apart once you know what to look for.
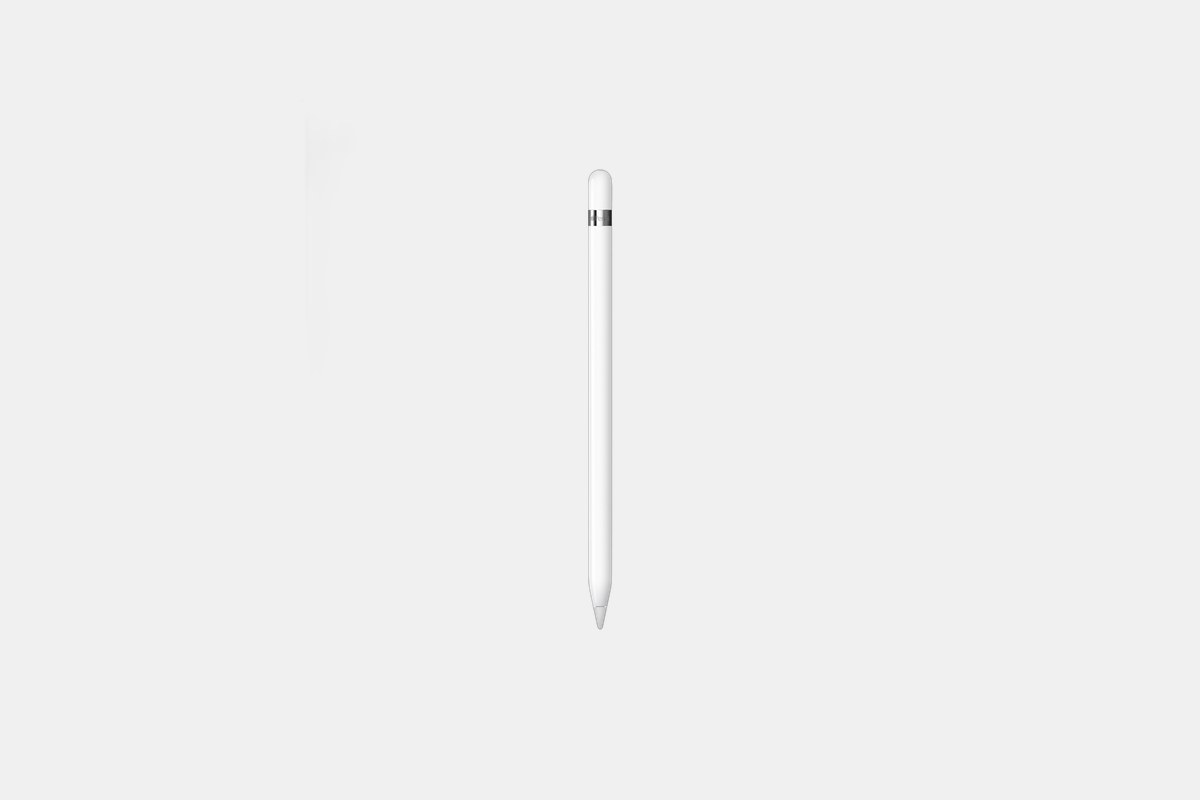
Apple Pencil (1st Gen): This one is perfectly round and glossy. It has a silver band near the top and a cap that pops off to reveal a Lightning connector, just like an old iPhone cable.
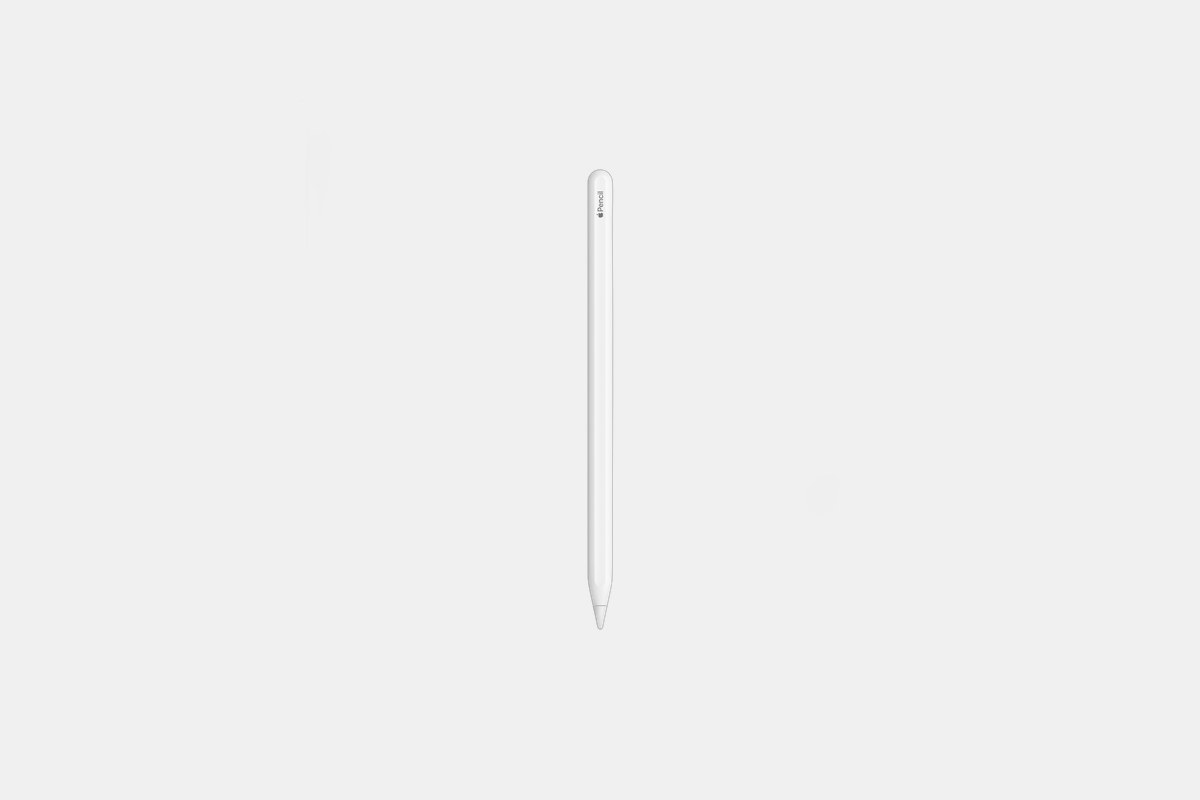
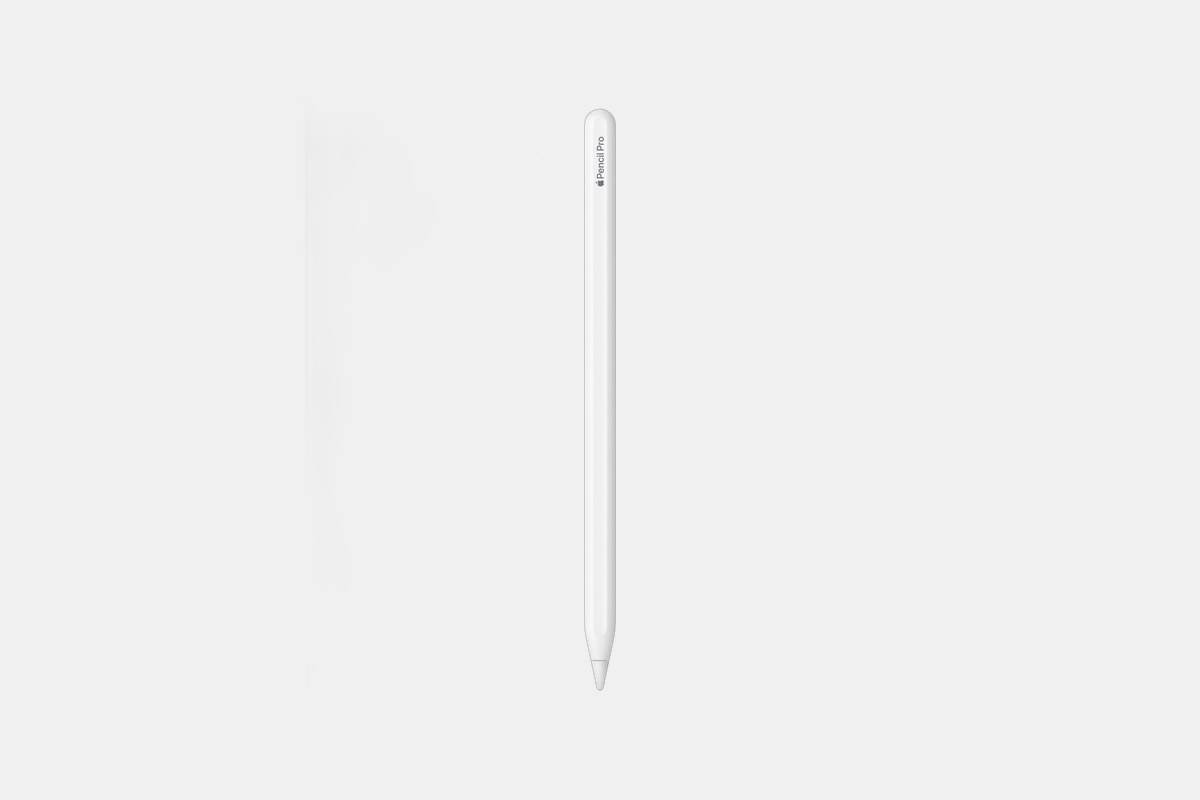
Apple Pencil (2nd Gen) & Apple Pencil Pro: These look almost identical. They both have a matte finish and one flat side that snaps onto your iPad. The Pro version actually says “Apple Pencil Pro” on its flat side if you look closely.
Apple Pencil (USB-C): This one also has a matte finish and a flat side. The trick is the end cap — it slides back to show a little USB-C port for charging and pairing.
This is the original, and its pairing method is pretty straightforward. You just have to plug it in.
First, pull the cap straight off the back of the Pencil. It might feel a little snug, but it’ll come off. Underneath, you’ll see a metal Lightning connector.
Now, just plug that connector directly into the Lightning port on the bottom of your iPad. A “Bluetooth Pairing Request” should pop up on your screen almost instantly. Tap “Pair,” and you’re good to go!
The trick nobody tells you: If you have a newer iPad (like the 10th generation) with a USB-C port, you’ll need the USB-C to Apple Pencil Adapter to make this work. It’s a small extra piece, but you need it for the initial pairing.
This is where the Apple Pencil iPad connection feels like magic. It’s so simple you might think you missed a step, but you didn’t.
Make sure Bluetooth is enabled on your iPad (you can check in Settings or the Control Center). Then, just take your Apple Pencil and place its flat side against the magnetic connector on the long edge of your iPad. It’s usually the side with the volume buttons.
You’ll feel it snap satisfyingly into place. A small image of the Pencil will appear on your screen to confirm that it’s pairing and charging. That’s literally it. You’re done!
The USB-C model is a bit of a hybrid. It snaps onto the side of your iPad for storage, which is handy, but it doesn’t pair or charge that way. I messed this up the first time, so don’t feel bad if you did too.
To connect it, slide the end of the Pencil back to reveal its hidden USB-C port. Now, grab a USB-C to USB-C cable. Plug one end into the Pencil and the other end into your iPad.
Just like with the 1st Gen, a pairing request will appear on your screen. Tap to accept it, and you’re all set. You can now unplug the cable and start using your Pencil.
Trying to decide which Pencil is right for you and your iPad? Here’s a quick rundown of the current lineup.

The Apple Pencil (1st generation) costs $99. It’s the perfect match for older iPads that use a Lightning port, like the 6th through 9th generation models, and it works great.
It’s known for its fantastic precision and responsiveness. The tilt and pressure sensitivity make it feel very natural for drawing, sketching, and taking notes. It pairs reliably by plugging it in, giving you a low-latency experience that’s ideal for creative work.
The Downside: You have to charge it by plugging it into your iPad, which can look a little awkward. It also requires that special USB-C adapter if you want to use it with the iPad 10th gen.
The Apple Pencil (2nd generation) is priced at $129. This is the one to get if you have a compatible iPad Pro, iPad Air, or iPad mini with the magnetic charging edge.
Its best feature is convenience. It attaches magnetically to your iPad to pair and charge wirelessly, so it’s always ready to go. You can also double-tap its side to switch between tools, which is incredibly useful. The lag is basically nonexistent, making it a favorite for professionals.
The Downside: It’s not compatible with the standard iPad models or any older iPads that lack that magnetic side connector.

The Apple Pencil (USB-C) is the most affordable option at $79. It’s a fantastic choice for everyday note-taking and markup on any iPad model that has a USB-C port.
It still attaches magnetically to the side of your iPad for easy storage, and it pairs and charges with a simple USB-C cable. While it doesn’t have all the bells and whistles, it has great tilt sensitivity and low latency, making it feel very responsive for writing and drawing.
The Downside: This model lacks pressure sensitivity. If you’re a digital artist who needs to vary line weight by pressing harder, you’ll want to look at the other models.
The Apple Pencil Pro costs $129 and is designed for creative professionals using the latest M-series iPad Pro and iPad Air models.
This Pencil adds some incredible new interactions. You can squeeze it to bring up a tool palette, and a new gyroscope lets you roll the barrel to change tool shapes, like a calligraphy pen. It also has haptic feedback and even works with Find My, so you can locate it if it gets lost in the couch cushions.
The Downside: It’s only compatible with the very newest iPad models, so you need to make sure your device is on the short list before buying.
Okay, so what happens if your Apple Pencil iPad connection is being stubborn? Don’t panic. It’s usually a quick fix.
First, double-check that Bluetooth is turned on in your iPad’s Settings. It’s a simple mistake we all make. Next, make sure your Pencil has a charge. If it’s dead, it won’t pair. Connect it to your iPad for about 10 minutes and then try again.
Sometimes, the classic “turn it off and on again” trick is all you need. Restart your iPad and see if that helps. If all else fails, you can force it to re-pair. Go to Settings > Bluetooth, find your Apple Pencil, tap the little “i” icon, and select “Forget This Device.” Then, go through the pairing steps from the beginning.
12 Best Clear iPhone Cases
Top 8 Neckband Earbuds
7 Best Crossbody Phone Cases
Best Toddler Cameras